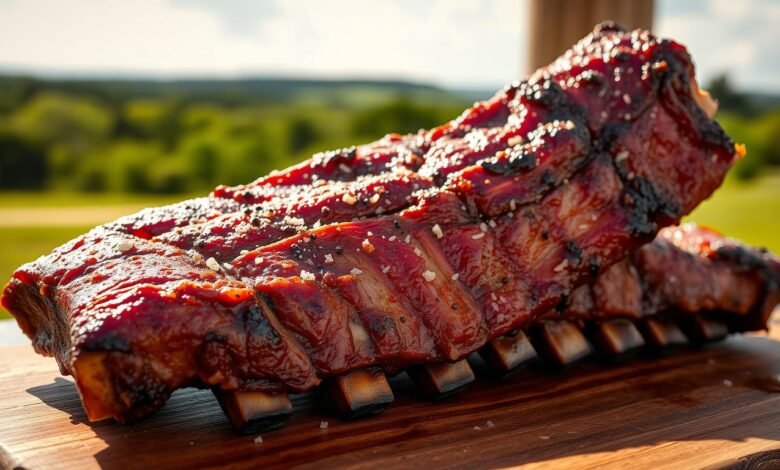
You remember the first time a slow-smoked rack fell apart with a gentle tug—that bright, sticky glaze and the warm hush of friends reaching for seconds.
This guide puts that feeling within reach for your next barbecue. You’ll learn low-and-slow methods that keep the meat juicy while building a rich bark. Temperatures near 250–275°F over indirect heat and steady turns every 20 minutes make a huge difference.
Chef-tested tips cover trimming, rub timing, and a simple ketchup-and-apple-cider vinegar sauce that gives tang and shine without burning. You’ll also get the right tools—tongs, thermometer, foil, drip pan, and brush—so the recipe runs smoothly.
By the end, you’ll feel confident reading doneness cues, finishing on the grill or oven, and pairing the meat with crisp salad, corn, or potatoes for a complete plate.
Key Takeaways
- Low-and-slow at 250–275°F over indirect heat preserves juices and builds bark.
- Layer sauce late for gloss without scorching sugars.
- Use simple tools: thermometer, tongs, foil, drip pan, and basting brush.
- Finish to about 200°F internal or use tactile cues like rib wiggle.
- Serve with sides such as coleslaw, corn, or potatoes for balance.
Why low and slow wins for grilled beef ribs today
Letting ribs sit at a gentle temperature unlocks deep flavor while melting connective tissue.
Low, steady heat melts collagen so the meat relaxes and stays juicy. Set your pit near 250–275°F and use indirect heat for an even cook.
Turn the racks about every 20 minutes. That prevents hot spots and helps a uniform bark form. Use a thermometer to watch pit temps rather than guessing.
- Plan for hours, not minutes; patience yields a true meat fall apart finish.
- Hold off on sauce until the last 10–20 minutes so sugars caramelize, not burn.
- Let the rub and smoke build layers, then finish with sauce for gloss and depth.
| Step | Target | Outcome |
|---|---|---|
| Pit temperature | 250–275°F | Steady rendering and bark development |
| Turn interval | Every 20 minutes | Even char and no scorching |
| Sauce timing | Last 10–20 minutes | Mahogany gloss without bitterness |
Choose your cut: beef back ribs vs. beef short ribs
Pick the right cut and you set the whole cook up for success, whether you want a neat rack or thick, braise-ready pieces.
Beef back ribs are rack-style and grill-friendly. They lay across grates with ease and take a light rub, indirect heat, and a late brush of sauce for a glossy finish. Look for good meat between the bones and avoid vacuum-packed racks that list salt or additives; those are often brined and will taste too salty.
Beef short ribs: thick, marbled blocks
Beef short ribs come as chunky blocks with individual bones. They love slow, moist cooking first—braise or pressure-cook—then get a quick finish over the heat for caramelized edges. Expect about 30% shrinkage, so pick meaty pieces with good marbling and a healthy meat-to-bone ratio.
- Pick back ribs for a classic rack that fits the grill and serves a casual platter or shared side.
- Choose short ribs when you want richer meat that benefits from braising, then a brief sear for color.
- Ask your butcher for bone-in cuts without added salts, and match rub amounts to thickness—lighter for racks, fuller for chunky cuts.
| Cut | Best prep | Why choose |
|---|---|---|
| Beef back ribs | Indirect heat, light rub, late sauce | Fits grates; cleaner rack presentation |
| Beef short ribs | Braise or pressure, then quick finish | Thicker meat, deep flavor after slow cook |
| Shopping tip | Buy bone-in, check label | Avoid brined or additive-packed packages |
Prep like a pitmaster: trimming fat and removing the membrane
Prep starts at the board: trimming surface fat and removing the thin membrane sets the stage for deep seasoning. Place the rack on a cutting board and check the bone side for that silvery membrane.
Peeling the membrane
Slide a butter knife under the membrane, lift gently, then grab the flap with a paper towel and peel in sheets. Removing it lets smoke and rub reach the meat and improves tenderness.
Trim excess fat but leave some marbling; intramuscular fat will baste the meat as it cooks. Cut away thick, hard fat that will not render.
- Mix your rub in a small bowl and break up clumps for even coverage.
- Season both sides, pressing the rub into crevices and along edges.
- Keep bone tips free of thick clumps so they won’t blacken and the rack looks neat when sliced.
Short cuts may already be prepped; focus on tidying loose fat there. Place the seasoned rack on a tray and cover loosely with foil while you finish the sauce or let the surface hydrate. Handle the meat gently so the rub stays put until it hits the heat.
Build bold flavor with a balanced dry rub
Start with a simple, balanced rub and you’ll set the stage for deep, caramelized flavor.
Core formula: blend brown sugar, paprika, garlic powder, onion powder, cumin, salt, and black pepper.
Whisk or sift these ingredients so the mix flows and coats evenly. Use about a scant cup when seasoning multiple racks, scaling by size and guest count.
Dial heat and sweetness
Adjust cayenne for heat—add a pinch for family meals or a fuller measure for a pepper-forward finish. Tweak brown sugar for caramel and gloss, but keep total sugar modest so the bark won’t burn.
Smart swaps if you’re missing an item
- Mustard powder can be swapped with a thin smear of Dijon or yellow mustard before you apply the dry mix.
- Fresh minced garlic pressed onto the surface replaces garlic powder when you want brighter garlic taste.
- Sift the mix again if clumps form; a smooth rub builds a better crust.
| Ingredient | Role | Note |
|---|---|---|
| Brown sugar | Caramelization | Moderate amount prevents burning |
| Paprika | Smoky color | Base flavor for sauce compatibility |
| Cayenne | Heat control | Add gradually and taste |
Final step: press the rub onto each rack and let it rest a short time so spices hydrate and cling. Salt within the mix for even seasoning and a consistent taste right through the meat.
Homemade barbecue sauce that lacquer-coats your ribs
A tangy, syrupy glaze begins with a bright ketchup base balanced by apple cider vinegar and brown sugar.
Start with the basics: mix ketchup, 1/2 cup apple cider vinegar, and 1/3 cup brown sugar. Add a teaspoon mustard powder, a splash of Worcestershire, and onion and garlic (powder or one clove minced).
Bring the mix to a gentle simmer and cook about 8 minutes, stirring with a spoon so sugars do not scorch. The goal is a syrupy, brushable texture.
Layer flavor and final steps
Add a pinch of cayenne for warmth and taste before you salt; the meat and rub bring savor too. If the glaze tightens off heat, loosen with a splash of water, a tablespoon at a time.
- Scale by the cup: make extra for basting and the table (plan about 1–2 cups).
- Use this base for beef short ribs or classic beef ribs finishes—baste in the last 10–20 minutes over indirect heat for caramelization without burning.
- Strain for silk or leave rustic with aromatics; refrigerate leftovers so flavors meld for next service.
| Ingredient | Role | Amount (example) |
|---|---|---|
| Ketchup | Body | 1 cup |
| Apple cider vinegar | Tang | 1/2 cup |
| Brown sugar | Sweetness/gloss | 1/3 cup |
Gear and grill setup for consistent results

Start by building a reliable station: assemble the tools and lay out an indirect zone so your cook runs without surprises.
Must-have tools and their roles
Essentials: sturdy tongs, an instant-read or oven thermometer, a metal drip pan, heavy-duty foil, and a dedicated basting brush.
- Set a true indirect zone—coals or burners on one side, food on the other—holding 250–275°F steady for ribs.
- Stage a drip pan beneath the rack to catch fat and reduce flare-ups and mess.
- Preheat grates so the rub sets on contact, then place ribs meat-side down first to start rendering.
- Turn gently with tongs and baste with sauce only near the end for a lacquered finish.
- Keep foil ready to tent or wrap if you need to nudge tenderness, and use the thermometer to avoid guessing.
| Tool | Purpose | Tip |
|---|---|---|
| Tongs | Move and turn racks | Use long, sturdy tongs to protect the bark |
| Thermometer | Monitor internal and pit temps | Prefer instant-read for spot checks |
| Drip pan | Catch fats, reduce flare-ups | Place under indirect zone |
| Foil | Tent or wrap for resting | Heavy-duty works best |
| Basting brush | Apply sauce late | Keep one brush for glaze only |
Chef Lola’s note: charcoal and gas both work well. Manage vents or burners with small adjustments, and have the oven on standby as a backup finisher for steady results during bad weather or long cooks.
How to grill beef ribs
Start by planning a steady cook: modest heat, a patient pace, and precise turns yield the best finish.
Marinate or dry-brine: timing and when to sauce
Lightly dry-brine with salt for an hour or overnight for deeper flavor. You may instead brush a thin marinade ahead, but keep most sauce for the end.
Set the pit and placement
Preheat your grill to 250–275°F and set an indirect zone. Place ribs meat-side down over indirect heat to start rendering and lock the rub.
Cook time guide and turning
Plan about 2 hours total. Turn every 20 minutes to even out char and avoid hot spots.
Baste, finish and rest
Baste with barbecue sauce only in the last 10–20 minutes, brushing thin layers so sugar and ketchup gloss without burning.
Watch sugars closely and pull when the surface just caramelizes a bit. Rest off heat before slicing between bones for clean pieces.
- Keep the lid mostly closed; open briefly for turns and saucing.
- Use a balanced sauce—ketchup and apple cider vinegar with measured sweetness—for a brushable lacquer.
- Serve bbq beef ribs hot with extra sauce on the side.
| Step | Target | Tip |
|---|---|---|
| Preheat | 250–275°F | Indirect heat, steady vents |
| Cook time | ~2 hours | Turn every 20 minutes |
| Saucing | Last 10–20 minutes | Thin coats, avoid burning sugar |
Oven and other low-and-slow methods when you’re not grilling
When the weather or equipment keeps you inside, low-and-slow oven work still delivers tender, sauce-ready results.
Oven-baked approach: cover the rack snugly with foil and roast at 325°F for about 2 hours. Uncover and continue until internal temperature reaches roughly 200°F; add 30 minutes if you want truly fall-off-the-bone texture.
Slow cooker and pressure cooker options
Use the slow cooker for an unattended path: set on low for about 8 hours, then finish under the broiler or on a hot grate for caramelization and sauce set.
A pressure cooker cuts active time to roughly 1 hour. After pressure release, transfer the pieces to the oven or a grill for a quick glaze and char.
Braising and fast finishing
Braise beef back ribs or short ribs at 275°F with stock, a splash of BBQ sauce, cider vinegar, and aromatics like onion, celery, carrots, and garlic for 2.5–3 hours.
Keep a shallow bath: add liquid by the cup as needed so the meat steams, not swims. Strain and reduce the braising liquid into a glossy sauce, adjust with a touch of sugar or vinegar, then brush and broil for color.
| Method | Time | Finish |
|---|---|---|
| Oven covered | ~2 hours + uncover to finish | Uncover until ~200°F internal; broil if desired |
| Slow cooker | 8 hours on low | Finish under broiler or on hot grate for glaze |
| Pressure cooker | ~1 hour | Transfer and sear or glaze in oven/grill |
| Braise | 2.5–3 hours at 275°F | Strain and reduce liquid into sauce; broil for color |
Know when your beef ribs are done and tender

Doneness is about feel and readings, not just the clock. A reliable finish uses a temperature check plus simple probes so you pull at the right moment.
Target internal temperature and tactile cues
Aim for about 200°F as a strong indicator that connective tissue has broken down and the meat has softened.
Wiggle a single rib bone. If it moves freely or wants to slide, the rack is nearly ready.
Quick tests you can trust
- Toothpick test: slide a thin probe between bones; it should slide in and out with little resistance.
- Surface check: look for a slight sauce set and a rendered sheen, signs the exterior caramelized without drying out.
- Spot-check temps across the rack since ends may cook faster than the center.
| Indicator | What it means | Action |
|---|---|---|
| ~200°F | Collagen broken down | Prepare to rest and slice |
| Bone wiggle | Flexible, ready for serving | Consider final glaze |
| Toothpick slide | Low resistance = tender | Remove from heat |
Resting and final steps
Give the rack a short rest for several minutes off heat so juices redistribute. Resist cutting immediately; slicing too soon lets juices run and can make the slices seem drier.
If you want a true meat fall apart finish, add about 30 more minutes at low heat. But avoid overcooking beyond the tender window, which can make the meat stringy.
Keep your sauce warm and brush a light coat after the rest if you want a glossy finish just before serving.
Serve it right: sauces, sides, and plating styles
Serve with intention: warmth, acidity, and texture make each mouthful hit the mark. Set up plates or a shared platter that balances rich meat with bright, crisp components.
Rustic platter ideas
Go casual: slice between bones and arrange on a board. Add a bowl of warm sauce for dipping and classic sides—steamed corn, a no-mayo coleslaw, green bean salad, cornbread, or roasted potatoes.
Keep a crisp salad on the side so richness stays balanced. Season those sides with acid and salt so they stand up to savory beef.
Elevated plate ideas
Stack small potato gratins, add sautéed spinach or mushrooms, and spoon a strained, glossy sauce over each portion for a refined finish.
Brush the meat lightly so the rub and smoke remain noticeable. Offer extra barbecue sauce at the table for diners who want more.
- Serve bbq beef ribs hot from the grill with a final, light brush of sauce for shine.
- Plate tidy bones facing outward and drizzle sauce in a controlled line.
- Garnish with chopped chives or parsley and use warm platters so temperature contrasts keep taste lively.
| Style | Main sides | Finish |
|---|---|---|
| Rustic | Corn, coleslaw, cornbread | Warm dipping sauce |
| Elevated | Potato gratin, sautéed greens | Strained glossy sauce |
| Plating tip | Salad or cool side | Light brush of sauce, garnish |
Make-ahead, leftovers, and storage for busy days
Chill your finished racks in their sauce so every slice stays moist on busy days. Rest the meat briefly, then cool and place in an airtight container with sauce. This holds juiciness and saves time when you need a quick meal.
Short-term storage: refrigerate up to 5 day and freeze up to 3 months. Seal tightly to prevent freezer burn and label each package with date and contents.
- Reheat covered in an oven at 350°F for about 20 minutes, then uncover briefly to re-caramelize the surface without drying out.
- Microwave gently for convenience, then give a quick finish on a hot grate or under the broiler for char and revived bark.
- If sauce thickened, add a splash of water or a cup of warm liquid to loosen before reheating.
- Tent with foil during early reheating to trap steam, then remove foil to set the glaze.
- Portion leftovers for shorter reheating minutes and use in fresh recipes like sandwiches, loaded potatoes, or tacos with a brush of barbecue sauce.
| Storage | Time | Tip |
|---|---|---|
| Refrigerator | Up to 5 day | Keep in sauce, airtight |
| Freezer | Up to 3 months | Wrap tight, label date |
| Reheat | 350°F ~20 minutes | Tent with foil, finish uncovered |
Conclusion
Keep these final pointers close: steady heat, a balanced rub, and a late glaze will take your cook from good to great.
You now have a repeatable recipe roadmap. Use a bowl to mix the rub, measure sauce by the cup, and tweak a bit of sugar, salt, and cayenne for balance.
Match cut to method: choose beef back ribs for direct finishing and beef short ribs for braise-then-sear. Place ribs over indirect heat and watch tactile cues for a true meat fall apart finish.
Strain sauce with a spoon for a glossy plate or keep it rustic for backyard barbecue. Chill leftovers in sauce, reheat gently, and refresh briefly on the heat before serving.
Chef Lola’s Kitchen (and inspiration from RecipeTin Eats) give you tools and technique. Trust the method and serve bbq beef with confidence every day.